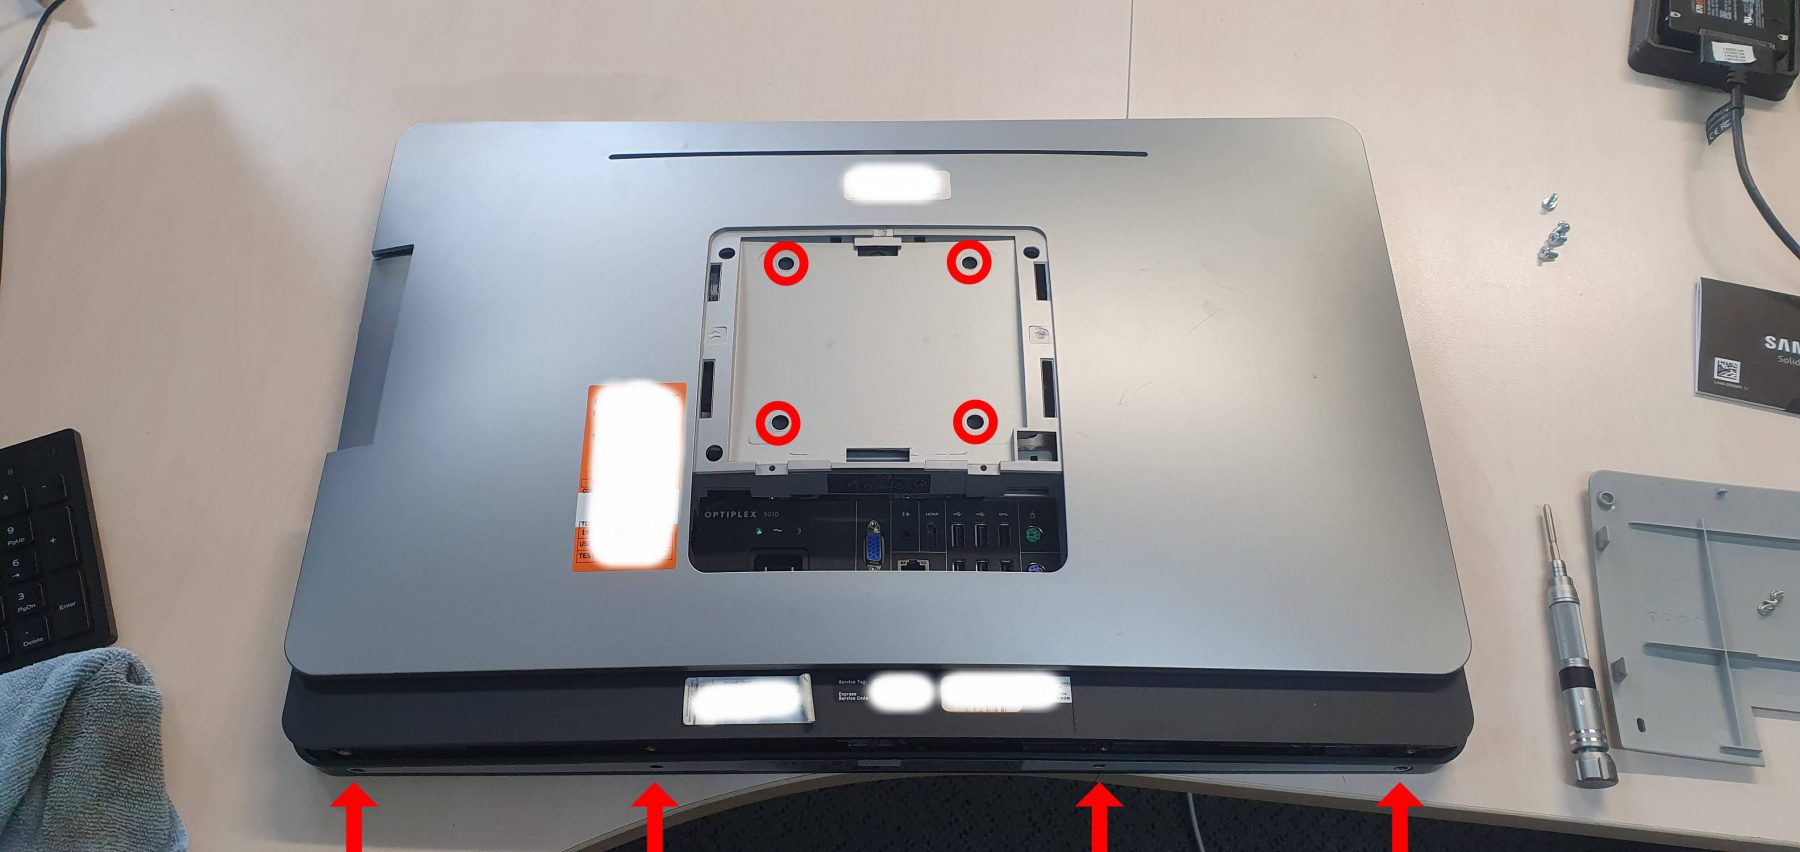
- With the computer facing down, remove the plastic stand cover on the back to reveal the screws connecting the stand to the display. This cover can be used as a convenient screw holder.
- Remove the 4 screws holding the stand to the display and lift from the bottom of the stand to unhook the stand from the display.
- Next, remove the 4 screws along the bottom of the display.
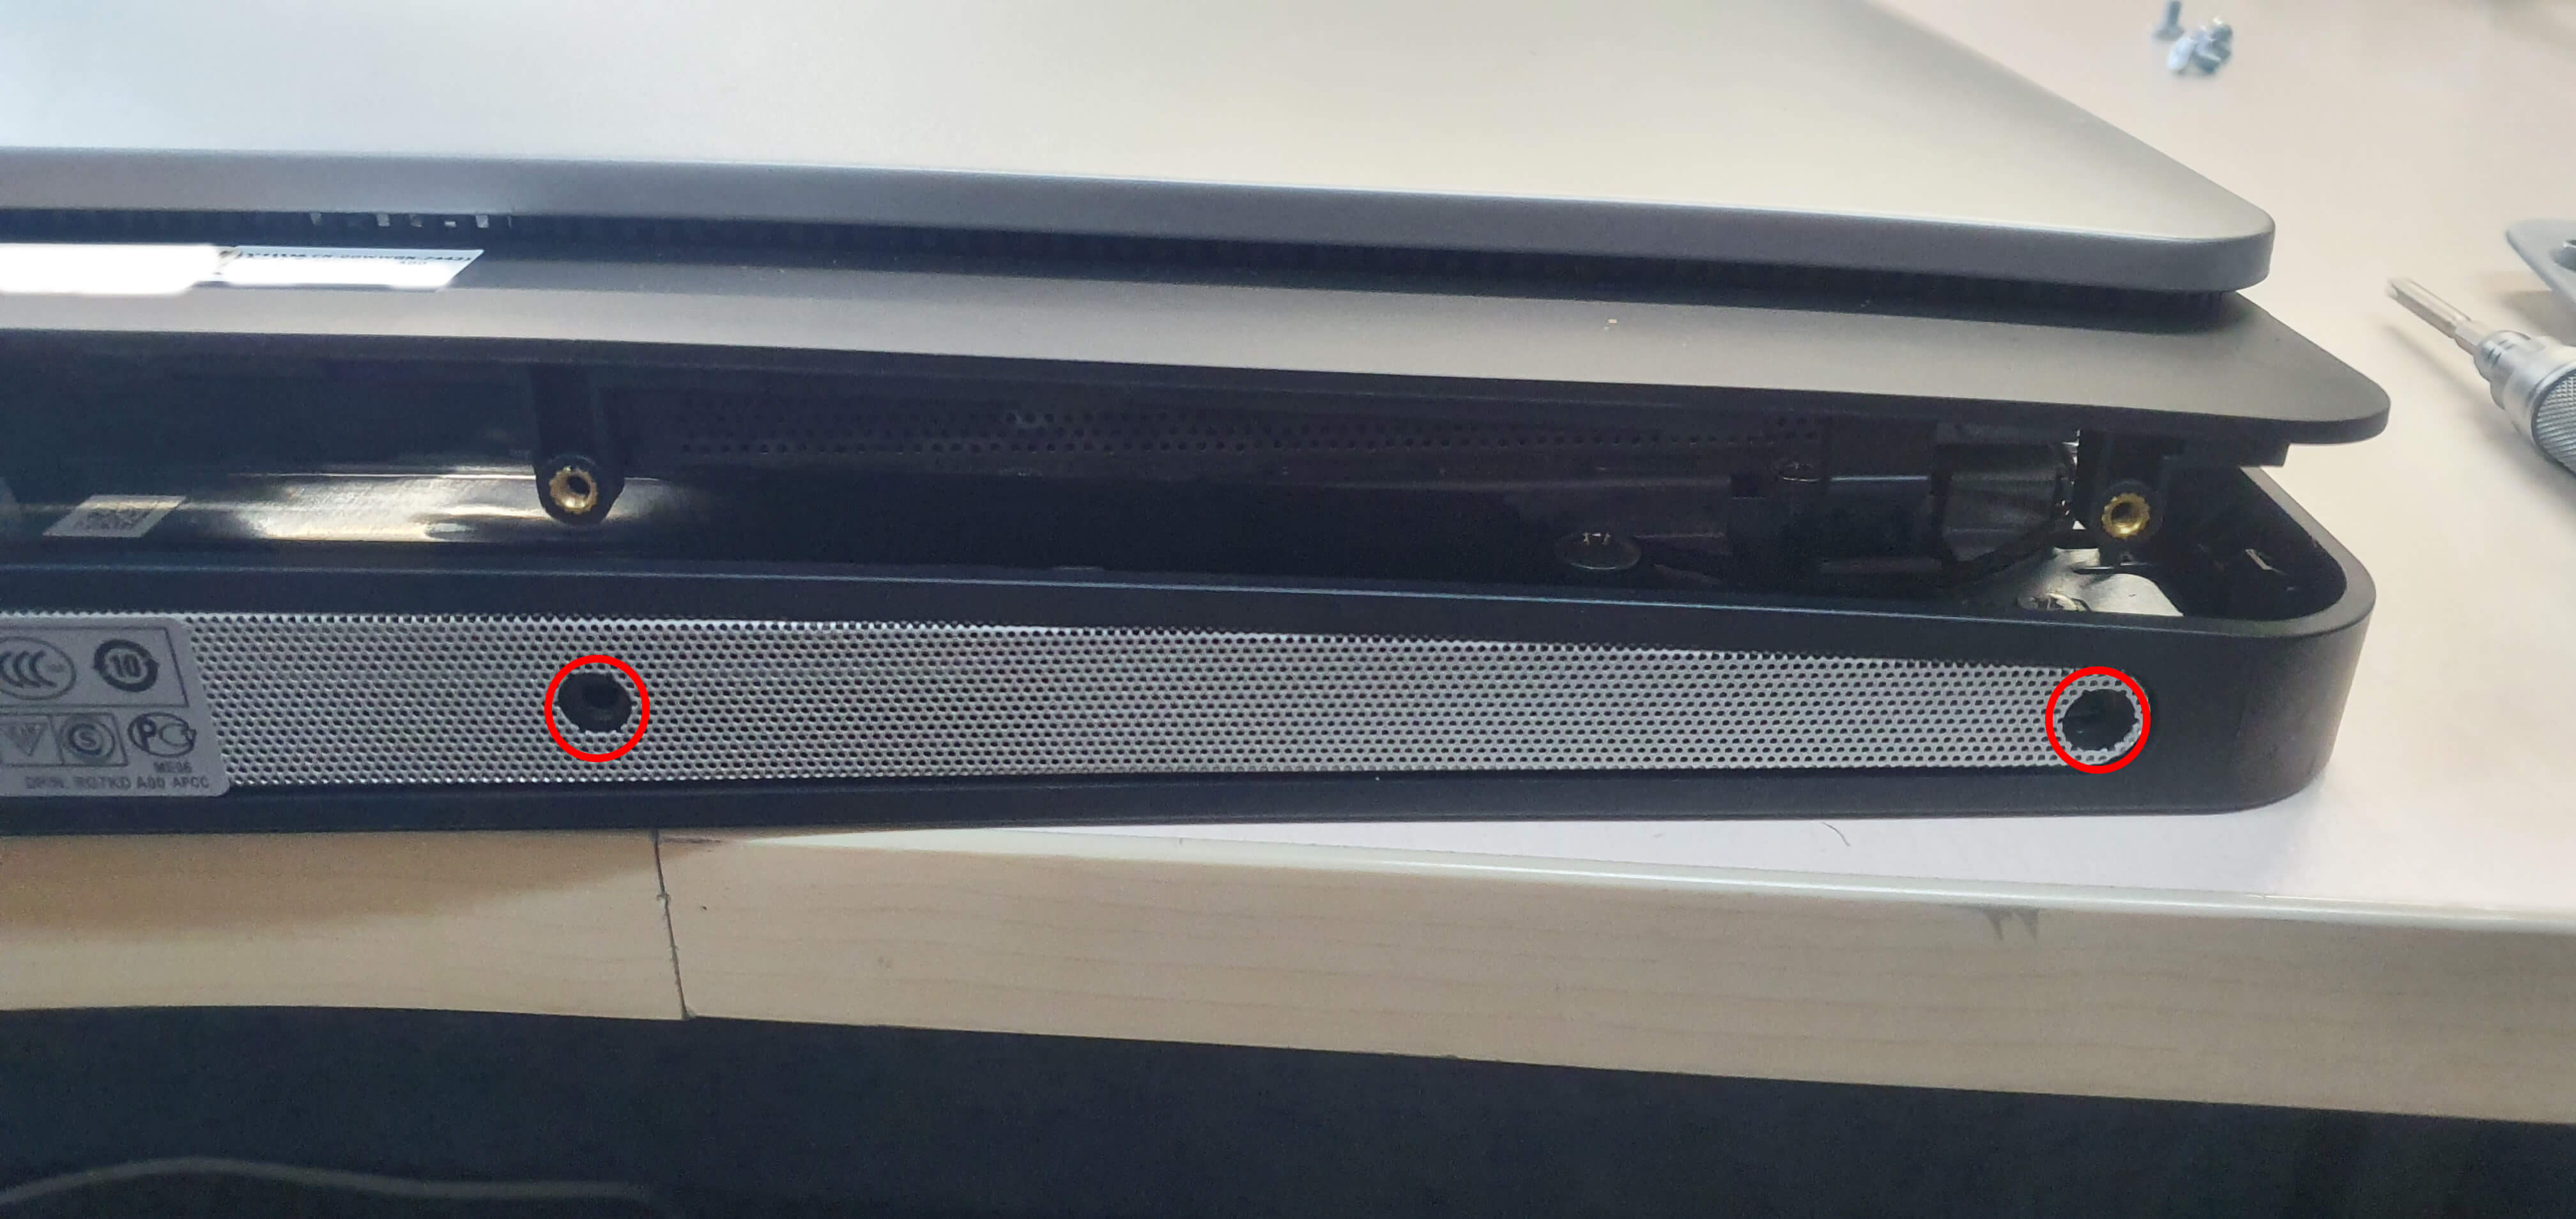
4. Use some plastic shims along the bottom edge and corners of the display to unclip the back panel.
5. Lift the back panel from the bottom and remove it from the display.
6. Now remove the 9 screws holding the stand mount to the main chassis. Lift this off and set it aside.
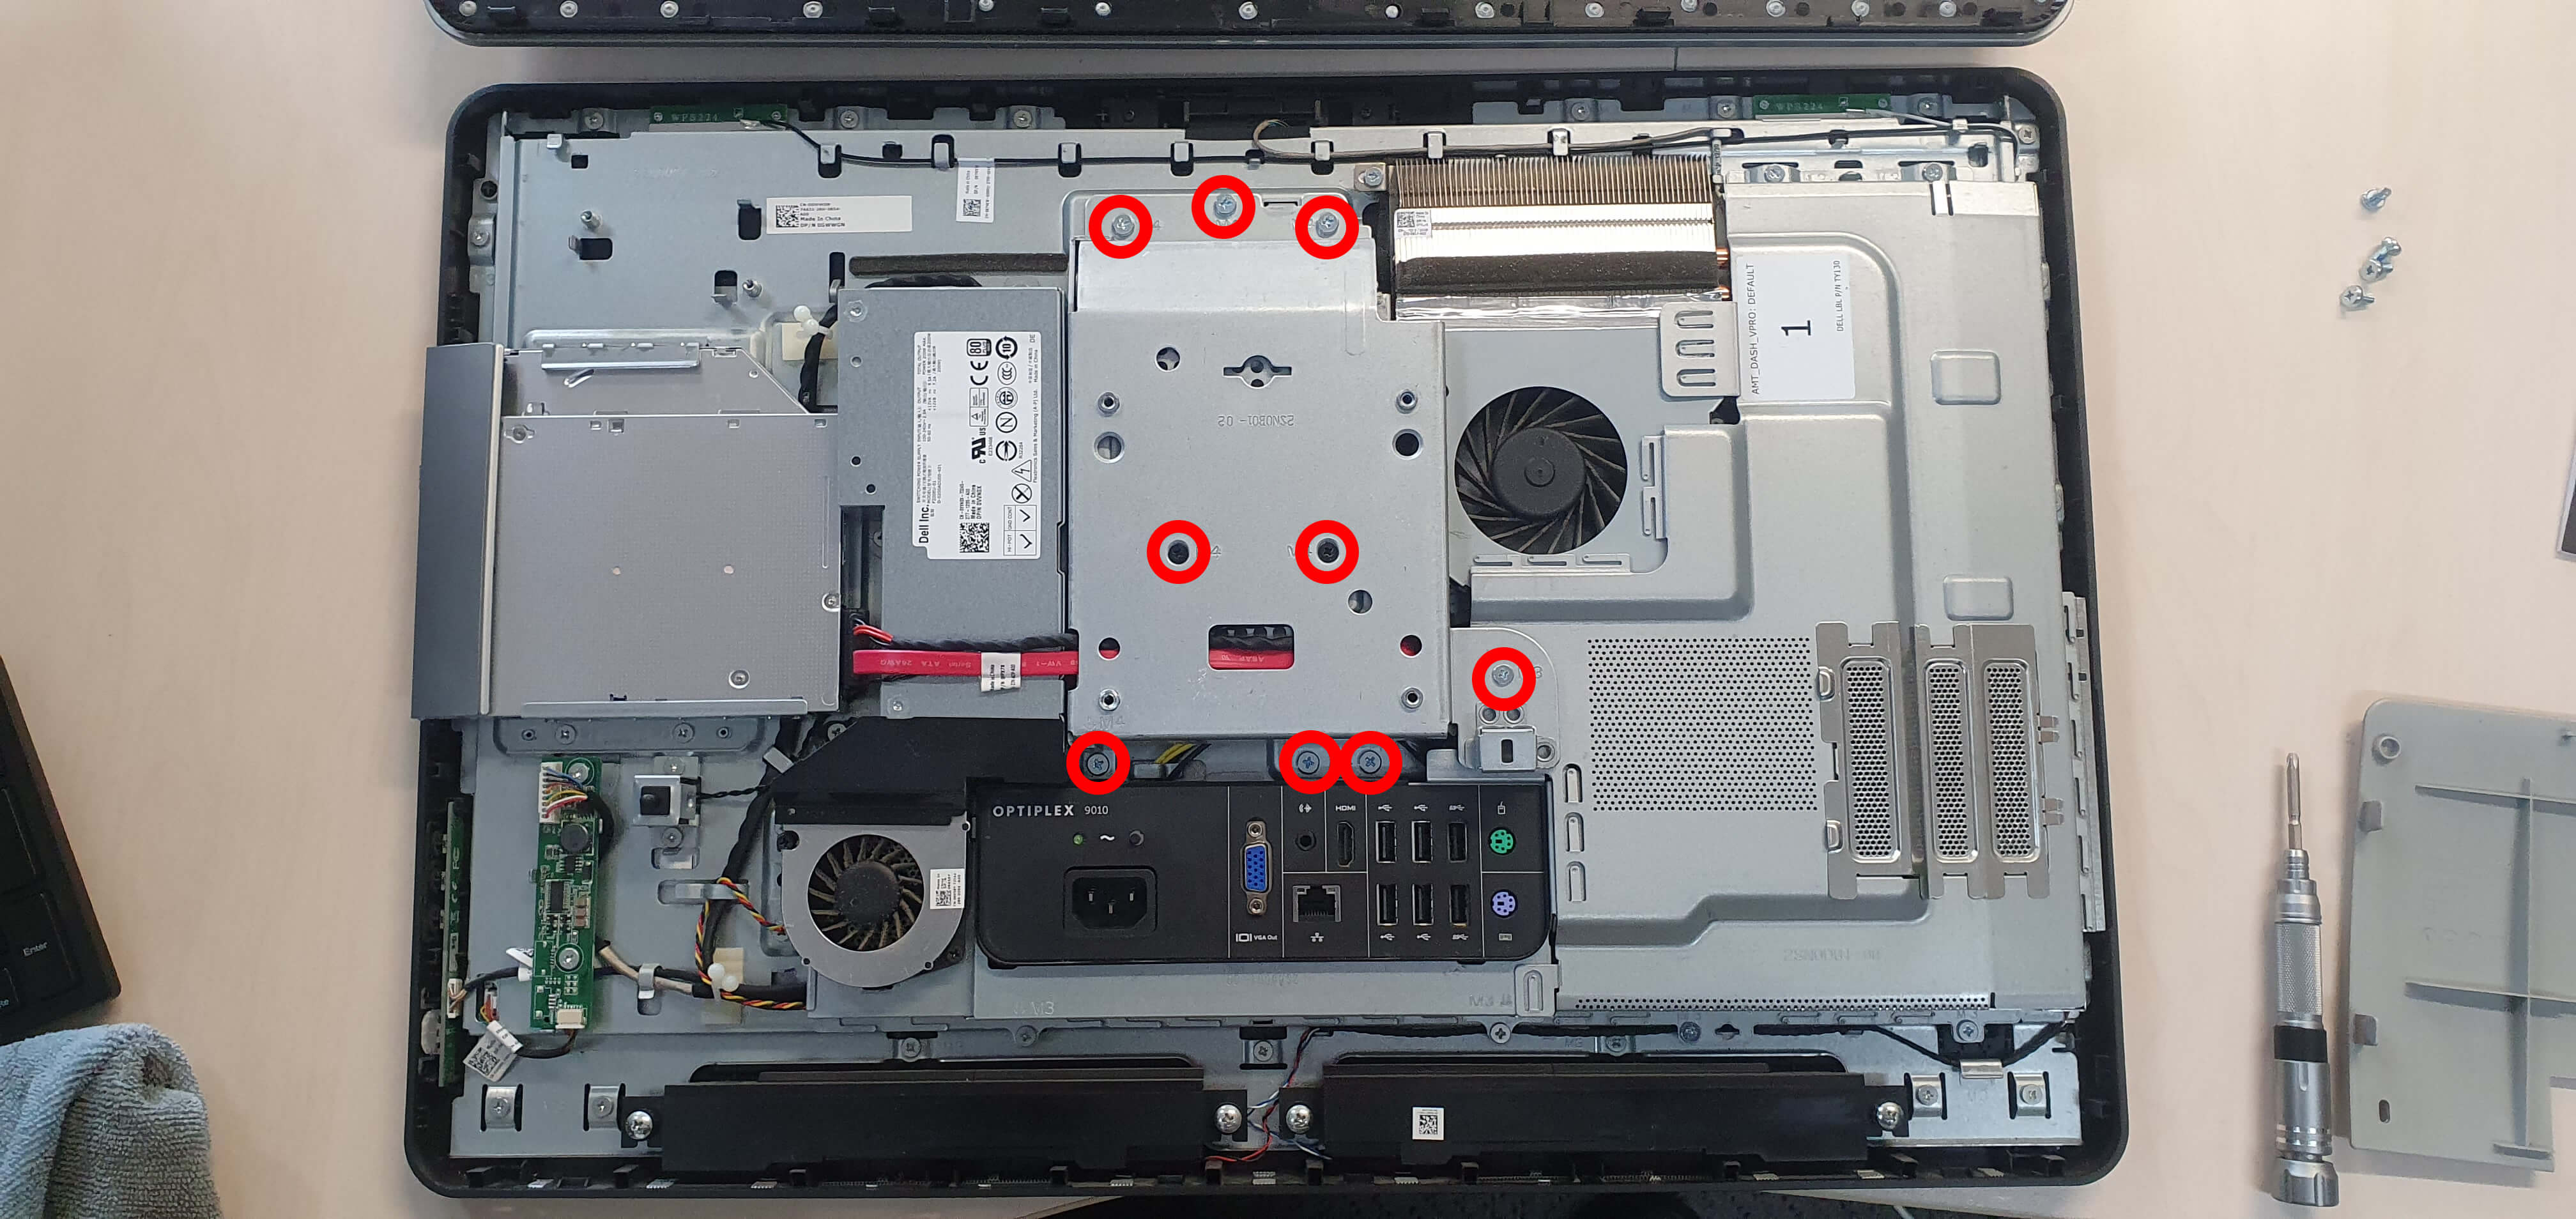
7. There is 1 screw securing the HDD tray, once removed the cage can be pushed up and removed, be careful to unhook the cables managed on the HDD tray.

8. Replace the HDD with your new SSD and reassemble it in reverse order.

Recent Comments